
There are hundreds of Pinterest ideas for lengthening T-shirts online. One method is stretching the t-shirt when it’s wet. It is said to add fabric softener or conditioner to the water first. If you don’t sew, you can add fabric or trim to the bottom using fabric glue or fusible tape. Watch out, though; this will come off in the washer and dryer and possibly stick to something else. Another tip is to take the garment to a professional and pay to have it altered.
If you can sew, it opens up an entirely new world of endless possibilities, like adding fabric, lace, and trim to the bottom of the garment. Know that you will want a fabric similar in weight. If not, it will warp the t-shirt’s structure, causing it to hang funny. Lace, a second t-shirt, or any lightweight fabric is a fantastic option. The nice thing about lace and knits is that most do not fray, and you do not have to finish your seams. What I did not see was how to lengthen a T-shirt from the top.
I hope you enjoy how I accomplished this look for only five dollars and utilized my local thrift.

Our Kettering Goodwill Thrift Store has so many nice fabrics that I can harvest fabric from. Everyone has their favorite store, and this one just happens to be next to my Rosewood Art Center studio. Convenience for the win! Besides low cost, I know that these fabrics most likely have been washed and will not fall apart or, even worse, PIL (those little balls of fuzz we use sweater shavers to remove).


I first cut the sleeves off along the seamlines. I cut the top of my t-shirt as high as I could go. Then, I cut the entire lace shirt apart and brainstormed ideas. Since this shirt is from my block printing class with Carlos Barberena, who is Latino, I wanted to honor him with a style that complements it. I went with cowboy yokes, having the V-yoke in the back. Once I had that together, I cut out the sleeves. I simply cut and gathered the sleeves to easily make them smaller as needed. Then, I took my scraps to see if I had enough for a collar.


Sadly, the flower toggle button I used at the top would not stay straight. I added three white buttons after my first dry run of wearing it.
Here is my piece from Carlo’s class at Rosewood Art Center.

The hardest part of this project was getting started and the fear of failure. Once I worked through every small step, it came together nicely.
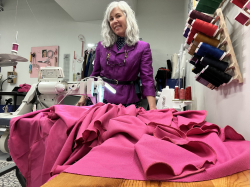
Behind the scenes ~ Come learn to sew at Rosewood Art Center with me and start refashioning, mending, and altering your clothing.

Thank you for reading!
Dream It! Sew It!
- Summer Mini Memade Handmade Fashion Show - July 10, 2026
- Jeans Hemming Tips in and Around a Minute - July 6, 2026
- Another Memory Quilt - June 30, 2026


Leave A Comment
You must be logged in to post a comment.