
15 years ago, I made this 1950s skater dress. The “skater dress” is named for its A-line silhouette, narrower at the top and flaring out at the bottom, like the dresses worn by figure skaters. While modern skater dresses don’t typically involve figure skating, according to a Google search, the connection began with figure skating fashion history, particularly with Sonja Henie in the 1930s, whose short, flared dresses allowed for more freedom of movement. The A-line skirt gained popularity in women’s fashion of the 1950s, and the term “skater dress” specifically references the shape resembling those 1950s flared skirts and earlier figure skating costumes.
In 2025, I’m revisiting this creation. Did it get easier? Does it fit better? Am I faster? I didn’t know what I was doing in 2010 but I must have at least had the directions and facings for the pattern, those things are missing today. And to make it even more challenging… I am using stretch knit costume fabric.

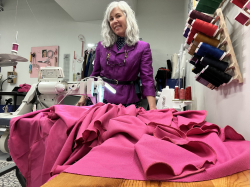
Mary Kathryn Burnside, owner of Clash Dayton, modeling a 2010s version of the skater dress.


Here we go again, learning from mistakes. Today, I had no problems making this without the directions. This was an improvement. However, not knowing the seam allowance was a problem with my modern material. The stretchy fabric made my dress come out larger than expected. I took the dress in at the darts, took the side zipper out, took the side seams in 2″, and it was still too big!


In my defense, I must ask myself at this point in my dressmaking and alterations role, if I am becoming a bit of a perfectionist?
This fabric was a gift from my mail carrier. It’s slightly stretchy, very thin and slippery, and all the moons and stars are sticky little plastic-coated metallic motifs that are printed onto the fabric. To top it off, it doesn’t like to be pinned. I definitely practiced on scraps before I began making my dress.
And then I set up my machines and made Suzie Goose an outfit as my model. I took a minute to get the needle right, so my machine didn’t eat the fabric. After her Halloween look, I had the skills and confidence to sew forward.

I used the salvages in her design and the last of the scraps for her hat.
Problem-solving the witches’ dress. With the fabric being so thin and light, I knew I would need to make both armhole and neck facings. This was no problem. I traced the neck and armholes and then added 2.5″ to the width. It would also need a very light but fusible interfacing. I went with black tricot iron fusible interfacing for the win.
It’s usually cold in Ohio for Halloween and I want to be able to wear leggings, a black turtleneck, and a slip under this dress. I tried this all on, and it would still need to be taken in a second time—this time at the French darts in the front.


Last, I didn’t want to buy a cheap Halloween hat. I asked around to see if anyone had made one locally or if I could borrow one. Seems there are a lot not in use.
Here is another skater dress I created this year.

Behind the Scenes ~
Besides learning to draw fashion and figures daily, I am taking a print class this year.


Thank You for Reading,
Dream it! Sew it!
Tracy McElfresh
- Test those new, vintage, random threads with this simple trick my mother taught me. - July 20, 2026
- Summer Mini Memade Handmade Fashion Show - July 17, 2026
- Thread Thread Thread - July 13, 2026


Leave A Comment
You must be logged in to post a comment.