
Sometime’s, it’s the pretty ones that slip through the cracks. I make so many dresses that I can’t remember which ones I have shared. Somehow this one slipped away. I hope you enjoy some of what I can remember now about this shirt dress from December of 2018.

I drew my design and then I looked for a pattern that could be altered to make my vision.
TIPS. You are never the size you think you are. Nowadays a lot of vintage patterns are being reproduced in today’s pattern sizes. These are not ready to wear sizes. Many new seamsters, including myself, go to make the size they wear in the stores and blame the patterns when the garments turn out way too small. In the 1920s a size 14 was for a 14 year old child. This number has been vanity sized in patterns and ready made clothing over the years. In vintage 1940s patterns I would have been a size 14, made for a 32” bust. 1972 was the last time big box patterns were vanity sized. In big box patterns from 1972 until today I’m a size 10 bust. In the off the rack or ready made clothing I am a 4-6 today. Indie patterns can be all over the place and the pattern designer chooses the sizing method. I believe this is why making clothing with big box, indie and vintage patterns can be confusing.
Knowing my size, I cut out my bodice of the dress. I used a really pretty crepe fabric with a slight give. It draped softly and elegantly for a dress of this time period. To make this pattern hack work I cut the shirt out a few inches shorter than the actual pattern because I knew I was going to add a waistband to the dress.

For the waistband I took a long and wide strip of the fabric and gathered lines every 1 1/2″ vertically. This would help with ease of the garment. It acts like elastic in the waistband, stretching as it needs to over my curves. I think it’s a pretty cool technique.
This dress would still require a back zipper to keep it slightly fitted in the waist because of the small neck hole. I wasn’t getting away with any short cuts this time.

For the skirt of the dress I cut the last piece of fabric in half for a front and back. I decided where the vent or slit should be and cut what was now to be the front again. I cut the back panel in half to support a zipper.
After many fittings I married the shirt to the skirt.


This dress really took me forever to make and it shows in the beautiful details. I’m already dreaming up next years holiday dress made out of red stretch silk and it is going to be a shirt dress. I promise not to let it slip through the cracks.
Modeling is the lovely Philomina Majesta Afua Darko.
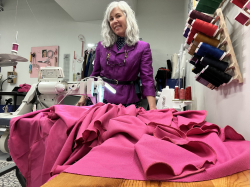
Behind the scenes~
If you want more information on making your own garments please join me for my next class, Pattern Reading and Layout. You will get an in-depth understanding on sizing, measurements, tools, books to read and so much more. Paper and pencil are the only supplies needed.
Thank you for reading,
Tracy McElfresh
Dream it! Sew it!
- Test those new, vintage, random threads with this simple trick my mother taught me. - July 20, 2026
- Summer Mini Memade Handmade Fashion Show - July 17, 2026
- Thread Thread Thread - July 13, 2026


Leave A Comment
You must be logged in to post a comment.