
This is my 25th year of making garments from the ground up and I’m celebrating by revisiting all I have learned! Things do indeed get easier with time. I hope you enjoy the changes; they sure surprised me and even made me sentimental.
I started making dresses from scratch in my late 20s because I wanted to create hippie festival dresses. At the time, we did not have access to shopping for anything and everything at the touch of a button. We also didn’t have 24/7 online learning. This pattern was originally intended to be my wedding dress, which my mom was to make for me. She has a mental illness and wasn’t able to. We happily purchased a dress from a store. It was blue and pink paisley, and she gave me this Kwik Sew pattern # ??? to make the dress myself.


I first noticed that the pattern did not have me stay-stitch the bodice necklines. From experience, I know the neckline with bias parts will stretch while fitting and sewing if they are not stabilized with stitches.

I remember the spaghetti straps taking hours to turn with a safety pin. I was able to flip them in seconds with tube-turners.

The empire waist bodice was self-lined. This means you use the same fabric and the zipper is enclosed between the two. I understand now that if I want to let out (or take in) the bodice, it’s much easier to do this at the back zipper if the lining and outer shell are serged together. If I made the dress according to the directions, I would have to take it apart in seven distinct areas to take it in at the sides of the bodice.

Marking my lines was so much smarter. I cut a small notch at the top and one at the bottom of the line, and used a ruler to chalk my slotted lace placement lines.

I no longer need to pin or tape my pieces on, (HA HA, TAPE!?!) I know how to finger-pin now. This is where you hold your fingers while feeding the fabric through the machine, lifting before you get to the machine needle, like my fingers are the pins. In garment factories they do not use pins because pinning takes too much time. They use notches and finger-pin.

The kicker is how to make the slotted lace. You are supposed to sew the lace on top of the dress and then cut away the back fabric and then top stitch with a zigzag. I remember that first dress fraying pretty badly. I sewed the lace to the top, cut down the middle of the fabric behind the lace, and then serged it. Way more professional!

I bet that very first dress I made was all one size, most likely a small, because I didn’t know how to grade pattern sizes. This time, I knew I was a size XS in the bodice, SM in the waist, and a MED in the hips. I still have a sway back I forgot to account for. This picture below is what happens with excess fabric in the back waist of any dress due to the curve and shortness of my back. Can you spot it?


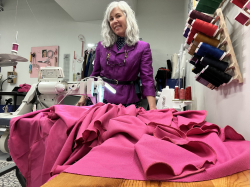
All the materials for this project and almost all of my projects were free from one of my Dayton Garment Designer Meet-Up fabric swaps. The best part is that instead of a month making this dress, I made it in one morning with my industrial Juki machine.
Behind the scenes~ My Deer Dress and Walk With Me dress are on display at Roswood Gallery through September 3, 2025.
Thank you for reading.
Tracy McElfresh
Dream it! Sew it!
- Test those new, vintage, random threads with this simple trick my mother taught me. - July 20, 2026
- Summer Mini Memade Handmade Fashion Show - July 17, 2026
- Thread Thread Thread - July 13, 2026


Leave A Comment
You must be logged in to post a comment.