
Hard to believe I have been sewing three years for Dayton History (Carillon Park). I’m going to share with you the 1860s men’s shirts I make for Carillon Brewery. I think you will be amazed at how much work goes into these seemingly simple workmen’s shirts.


The first year I used a pattern that the brewery gave me. The pattern was way larger than the men’s sizing, it was also too long and used a TON of fabric. The whole pattern was ridiculously and overly complicated. Just about everything on the shirt needed to be changed, from the sizing and the neckline placket to the big floppy collar.

I made those shirts for a year until the park realized I could replicate existing garments. A brewmaster gave me a worn out volunteer’s medium size shirt to deconstruct and make a pattern from. The first shirt was a hit. For future shirts sizing I added an inch for each larger size and took away an inch for each smaller size.


Deconstructing the shirt was fun, but tough. Homespun fabric is the same on both sides making these shirts incredibly hard to piece together correctly. Pieces can easily be sewn on to the wrong side of the garment. This happened to me a couple of times before I double checked every single step of the way. I really needed to put an order to the correct sequence the garment needed to be built in.

I like to cut two shirts out at once when they are the same size and sew them to save a little time. Each shirt takes three yards of homespun fabric. I fussy cut the pieces, press and starch them and then cut them out again precisely.
These shirts consist of the front, back, neck binding, shoulder supports, under arm gussets, sleeves, cuffs, collar and buttons. That’s a lot of pieces!

I put the plackets in the front vertical neckline first. For the first two years I studied plackets on every television show I could find. Seems the 1970s had a ton of neckline plackets. The show Freaks and Geeks was full of them.
I cut 2 1/2″ strips on the bias and press the edges towards the center of the bias tape. I sew it on the inside of the shirt, flip it, press it and then top stitch it down to the outside.
I reinforce the bottom of the placket by sewing a square and an X into the center bottom. There is no fraying after multiple washes.

The shoulder seams are also sewn and serged to withstand multiple washes. Then comes the shoulder supports. I believe that shoulder supports were originally made because homespun is a loosely woven fabric and shoulders that were hand sewn probably frayed out. For these I cut two 10″ x 4″ strips on grain, edges pressed to the center and top stitched on right over the shoulder seams. It’s impossible to match the print because the plaid is not squared and the two grain lines are different.
 The neckline consists of a 2″ bias cut strip folded in half and pressed. It is sewn on the outside of the neckline, serged and finally topstitched down.
I use a permanent fabric marker to label the size.


The side seams are sewn and the shirt hemline is serged and topstitched down.
It’s really easy to match up 1/2″ plaid. I simply run the fabric through the serger letting the bottom layer peek out just enough to insure I have it all lined up.

Now it’s time to set the bodice of the shirt aside and start piecing the sleeves.
I do the easy stuff first. I gather the top and bottom of the sleeve.

It took me a long time to figure out how to get the gussets quickly.
I learned that if I serge one side of each gusset and then serge the other side of each unfinished gusset directly to one side of the sleeve and then serge the other side of the sleeve it makes it all go together faster. You got that? It’s really all just pre-serged because at the bottom of the sleeve we have a 3″ vent that needs to flow open.
The cuffs, boy were those hard at first! I have learned many short cuts to mass producing these shirts. I pre-sew them all and press them.

While the sleeve sides are still open I sew the raw edge of each cuff to the inside gathered sleeve and flip in the 3″ sleeve opening to the inside of the sleeve. Last I topstitch the cuff on the front.
Doing it wrong over and over is a great lesson. Not wanting to spend time seam ripping helps motivate.

With my regular sewing machine I sew up the final side of the sleeve. This leaves a 3″ opening at the sleeve bottom.

One side of the gusset will match up but the other side will not match the print.

Now is the time to topstitch that sleeve bottom opening down before I set the sleeve in. It is much easier to sew smaller pieces when possible.
Then it’s quality check time.


I wish putting on the sleeves was the final step. I slip the sleeve into the shirt, right sides together, then pin and stitch around. Next it goes to the serger to keep the edges from fraying out. The last step on the sleeve is to tie the serger tail.


I like to come back the next day and do the finishing techniques when I am clear headed. I mark the button hole placements with a friction highlighter, sew the button holes, chisel them open and sew the buttons on by machine. These shirts have 5 buttons each and it takes a while.


We have a shirts! A lot of them!


Photos by Carol Calzada
My favorite for the men’s costumes was making the 1860s vests out of an old flag that hung in the museum.

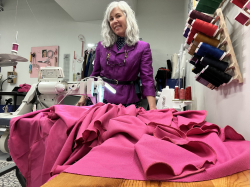
Behind the scenes~
Almost forgot, we have a contest going on our Facebook page.

Thanksgiving vacation was a blast but busy. Friends, family, puzzles, cookies, Small Business Saturday, photo shoots and so much more.


Thank you for reading,
Tracy McElfresh
Dream it! Sew it!
- Test those new, vintage, random threads with this simple trick my mother taught me. - July 20, 2026
- Summer Mini Memade Handmade Fashion Show - July 17, 2026
- Thread Thread Thread - July 13, 2026


Leave A Comment
You must be logged in to post a comment.